Goods and Services Tax (GST) registration is mandatory for businesses in India whose turnover exceeds the prescribed threshold. Here’s a complete guide to GST Registration in Bangalore.
Manufacturers, Traders & Wholesalers shipping goods to another state, Service providers offering services in multiple states, drop shipping & E-commerce sellers selling across states, Interstate stock transfers between branches of the same business.
Examples of CTP:
Examples of NRTP:
For Partnership Firms:
For LLP Registration:
3. For Private Limited & OPCs
Registering for GST in Bangalore offers several advantages for businesses, especially in a rapidly growing commercial hub. Here’s why GST registration is beneficial:
a. I am a –In this select the type of registration being sought. Select Taxpayer for
getting a normal registration in GST.
b. State/UT – Select the State or union territory in whichregistration is being sought.
c. District – Select the district.
d. Legal Name of the Business – Enter the name as mentioned in PAN Card. A person applying as Tax Deductor under GST can also use TAN instead of PAN.
e. Permanent Account Number – Enter PAN No.
f. Email Address – Enter an email address. Email should be valid and accessible as GST portal/department will send OTP to this email for future transactions.
g. Mobile Number – Enter mobile number, GST portal/department will send OTP to this number for future transactions.
Click on PROCEED.
Two (2) separate OTPs will be received on email and mobile number on the details mentioned above. Enter the OTP’s received and you will receive a TRN on email and mobile no.
4. Repeat step 2, instead of NEW REGISTRATION click on TEMPORARY REFERENCE NUMBER (TRN). Now enter the TRN received on your email or mobile. Enter CAPTCHA code and click on PROCEED.
5. Enter OTP received on your mobile or email. This OTP will be the same on both. Click on PROCEED.
6. Now in the DASHBOARD you will see My Saved Applications, in that click on the Action button.
7. Now the Registration Application Form will open. This form is valid for 15 days from the last saved date until submitted. It has 10 tabs namely:
a. Business Details
b. Promoters/Partners
c. Authorised Signatory
d. Authorised Representative
e. Principal Place of Business
f. Additional Places of Business
g. Goods and Services
h. State Specific Information
i. Aadhaar Authentication
j. Verification
Explaining each Tab in detail:
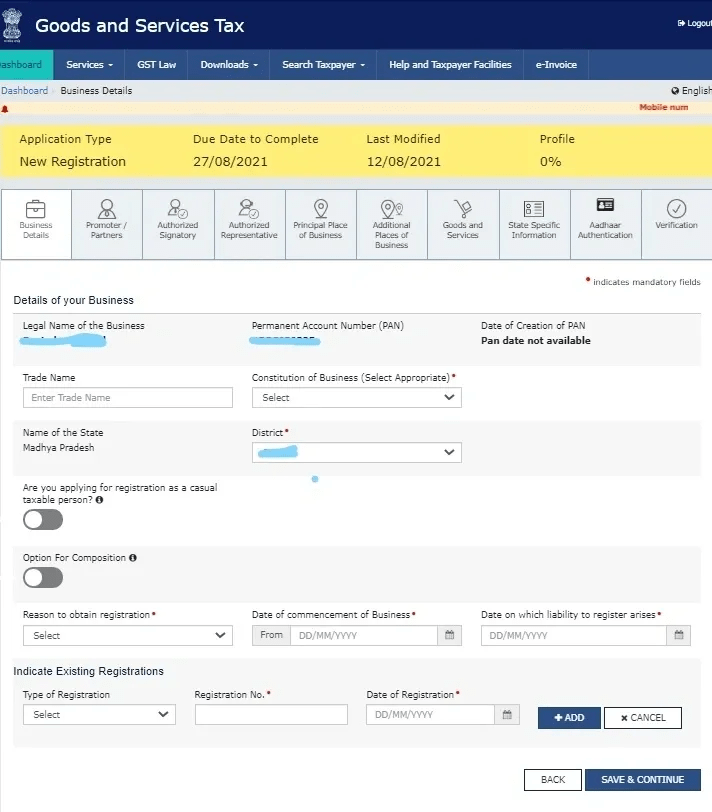
A. Business Details:
I. Legal Name of Business – This will be auto-populated from the information mentioned in step 3.
II. Permanent Account Number –This will be auto-populated from the information mentioned in step 3.
III. Date of Creation of PAN –This field will be auto-populated. Sometimes it may show PAN date not available, it is not a concern to proceed further.
IV. Trade Name –Here Trade Name i.e. the name by which business is being run. This name is different from the Legal Name. It is an optional field.
The legal and trade name can be different.
V. Constitution of Business – Select the type of business. Ex. Individual, Partnership, Private limited company etc.
VI. Name of the State- This field is auto-populated from the information mentioned in step 3.
VII. District – Select the appropriate district.
VIII. Are you applying for registration as a casual taxable person? – Select ‘Yes’ or ‘No’ based upon the registration being sought.
IX. Option for Composition – Select ‘Yes’ or ‘No’ depending on whether the composition scheme is being opted or not.
X. Reason to Obtain Registration – From the drop-down menu select the reason for registration. Kindly refer to previous posts for identifying reasons which suit you.
XI. Date of Commencement of Business – Enter the date on which business was started. This date should be the business commencement date not the date on which you apply for GST registration or become liable for GST registration.
XII. Date on Which Liability to Register Arises – Enter the date on which you become liable to register under GST. Kindly refer to previous posts for identifying the date on which your liability to register arises.
XIII. Indicate Existing Registrations – If the person has any other registration under any other law in force, then the same shall be mentioned here. Ex. registration under VAT, Excise, Companies Act, LLP Act etc.
Click on ‘SAVE & CONTINUE’
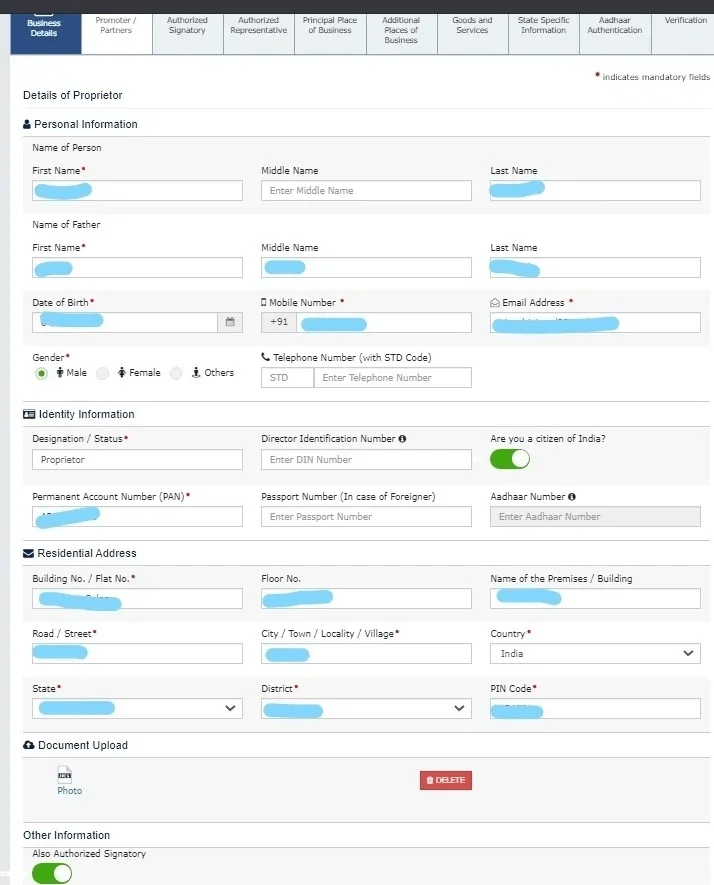
B. Promoters/Partners
Note: PAN no. is a mandatory field for a person who is a citizen of INDIA. But when
the No is selected in (c) above then PAN is removed as a mandatory field and
PASSPORT number becomes a mandatory field.
Click on “SAVE & CONTINUE’
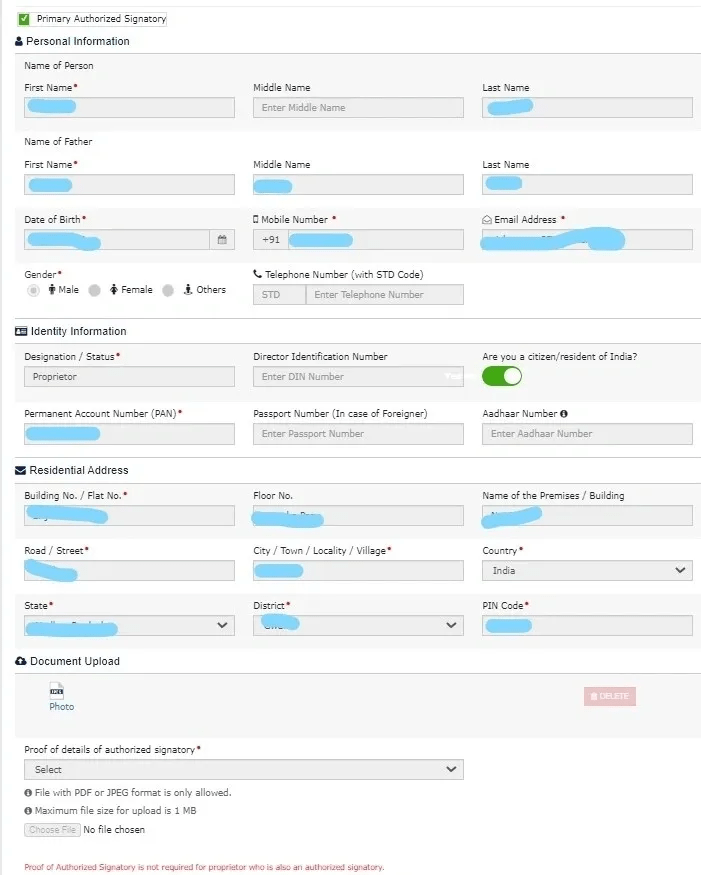
C. Authorised Signatory
(i) Primary Authorised Signatory – Select this option for the authorised signatory who
will be primarily communicating with GST department. This is to be selected even if there
is one authorised signatory.
Note: For all other information follow the guidelines as mentioned in Part B.
Promoters/Partners.
Click on ‘SAVE & CONTINUE’
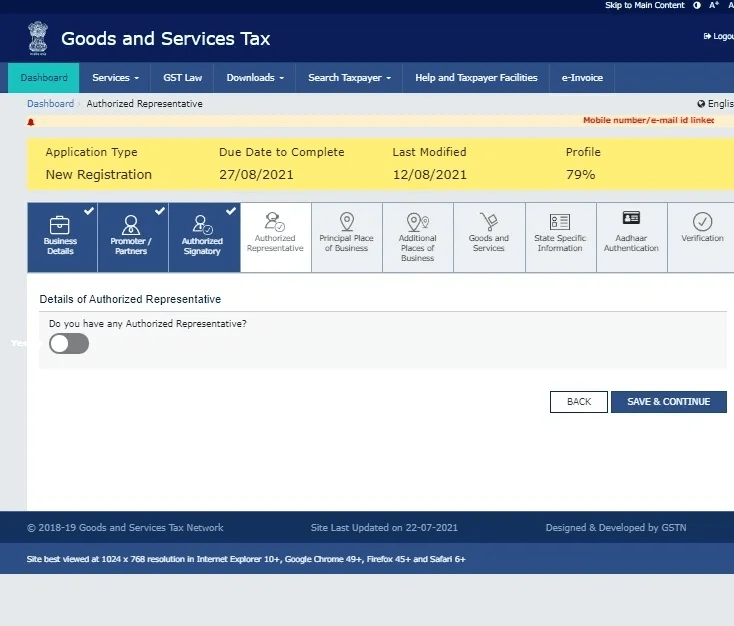
D. Authorised Representative – In this enter details of an authorised representative if you have any. Authorized representative means a person who is authorized by a person to appear on his behalf.
For this purpose, “authorised representative” includes a relative, a regular employee, an advocate, a chartered accountant, a cost accountant, a company secretary, or any person with prescribed qualifications.
Click on ‘SAVE & CONTINUE’
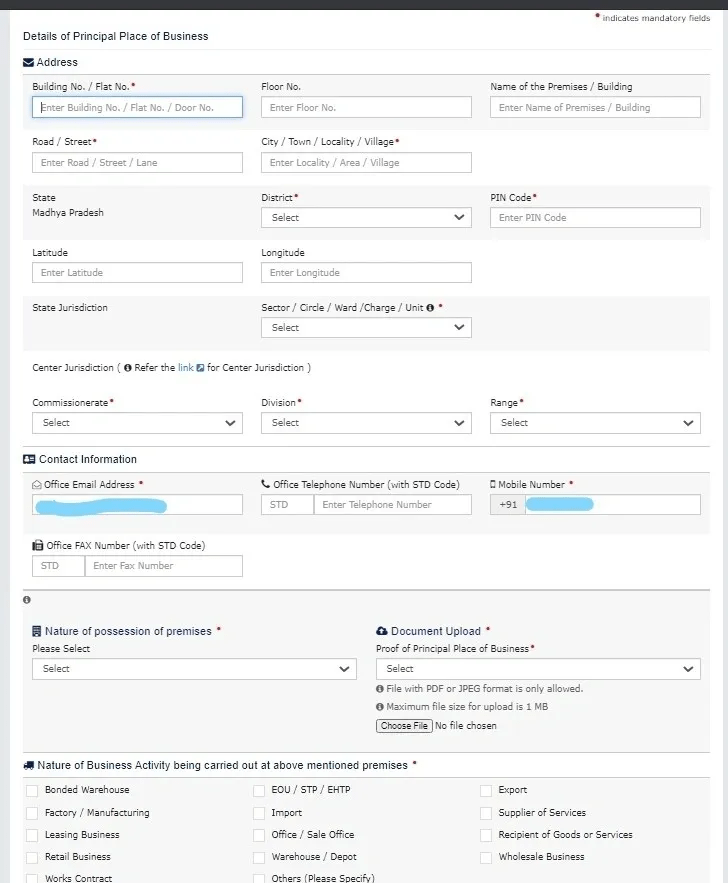
E. Details of Principal Places of Business
Note: Where consent letter from owner or NOC from owner is being used then either electricity bill, property tax receipt etc. of such address shall also be attached with such consent letter or NOC.
Note: If a person has an additional place of business in any other state or UT then a
separate registration in that state or UT is required.
Click on ‘SAVE & CONTINUE’
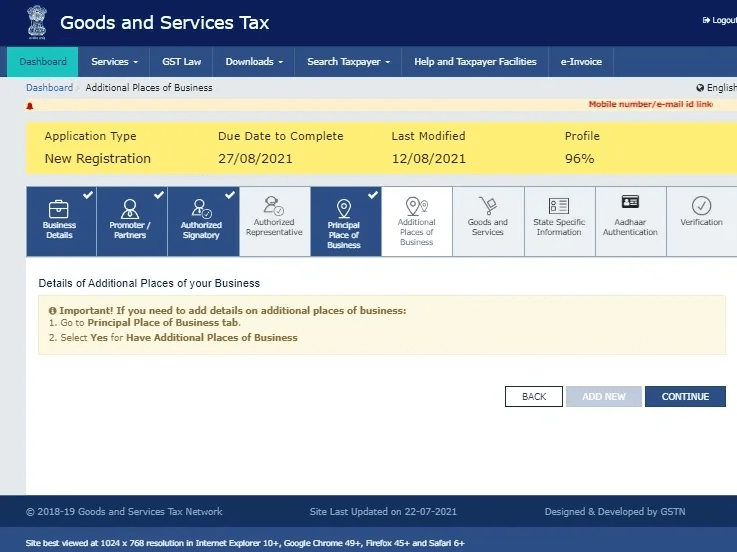
F. Additional Places of Business
Here enter the details of additional places of business, if any. Guidelines from E. Principal Places of Business apply here also.
Click on ‘SAVE & CONTINUE’
G. Goods and Services – Here specify the top 5 goods or services to be supplied.
Click on ‘SAVE & CONTINUE’

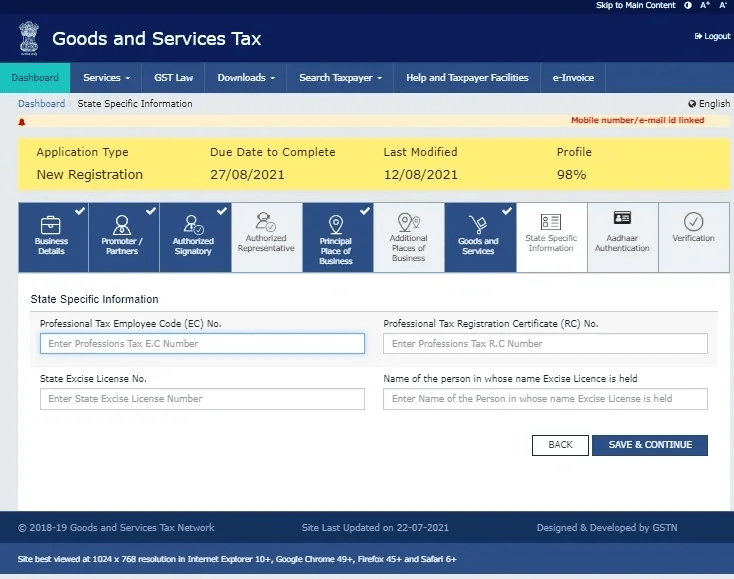
H. State Specific Information – If you have any existing registration for Professional Tax or State Excise or both then mention the details of such registration here.
Click on ‘SAVE & CONTINUE’
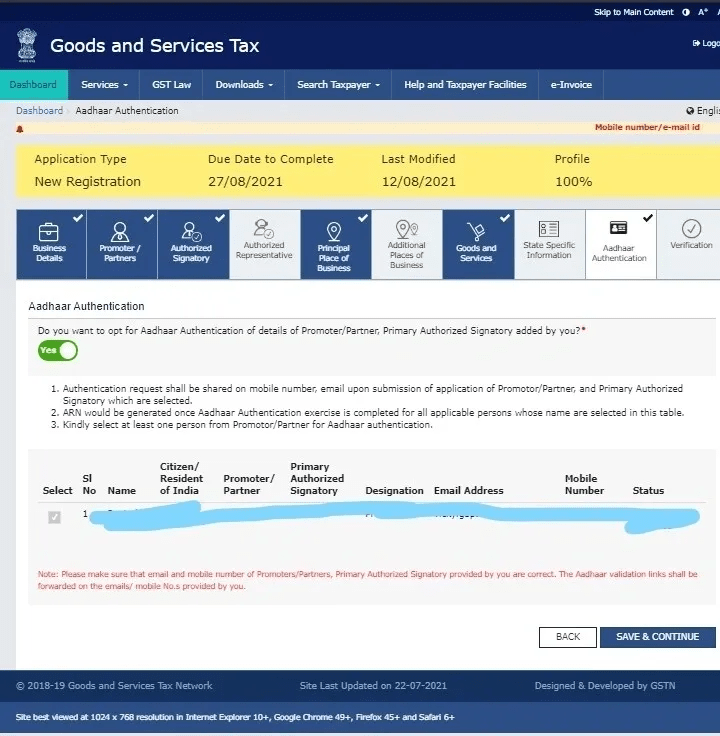
I. AADHAAR Authentication: In this window, you have to select ‘Yes’ or ‘No’ for AADHAAR authentication for promoter/partner etc. and primary authorised signatory.
Where the proprietor, partner, promoter etc. are the primary authorised signatory then only one AADHAAR authentication is required.
But where they are different person then both have to go for AADHAAR authentication.
In our next post, we will learn why AADHAAR authentication is important.
Click on ‘SAVE & CONTINUE’
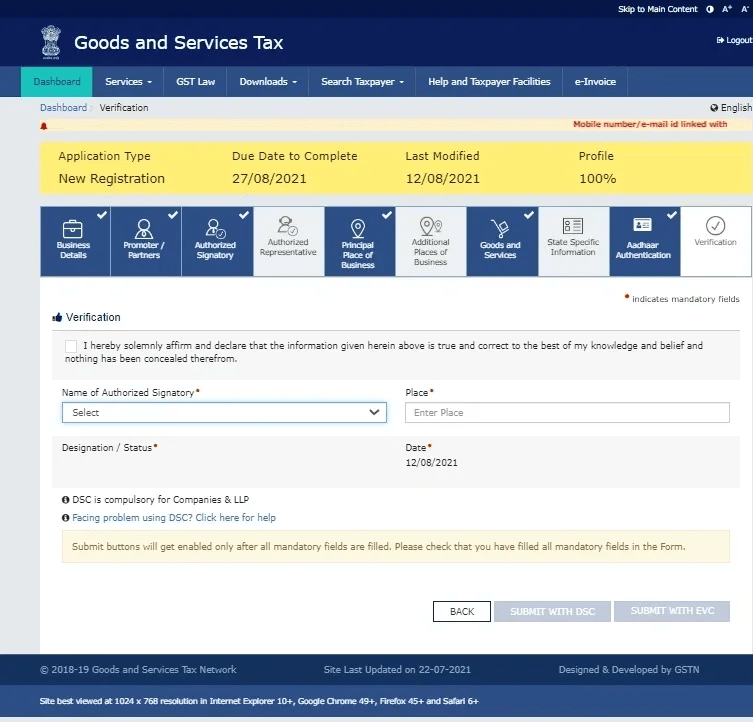
J. Verification – In this window you have to check the declaration, select the name of the authorised signatory, enter the place and then verify the application through EVC or DSC.
EVC is a code that will be received on email and mobile no. of the authorised signatory.
In the case of Company or LLP verification can be done only through the DSC of the authorised signatory.
Click on ‘SUBMIT’
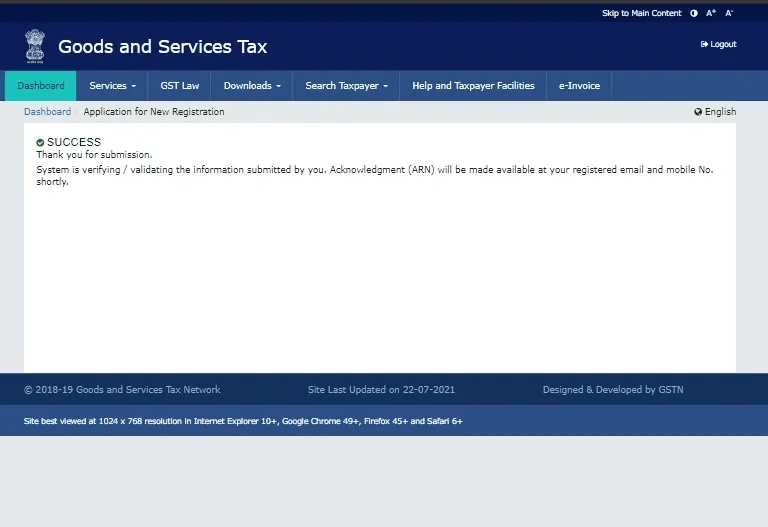
After the verification is complete, the system will verify the information and will send a link for AADHAAR authentication on mobile and the email id provided.
After AADHAAR authentication is complete ARN will be generated and after verification of application registration will be granted.
Where AADHAAR authentication is not opted, the system will generate ARN within 15 minutes of submitting the application after verifying information from the PAN database.
ARN will be sent to registered email id and mobile no.
Choosing Chhota CFO for your GST registration in Bangalore offers a range of benefits tailored to meet the specific needs of businesses:
1. Knowledge of the GST Regulation
Among the seasoned professionals on our staff who are familiar with GST laws and regulations are Company Secretaries, cost accountants, and Chartered Accountants. Their extensive background guarantees that your GST registration and compliance needs will be handled accurately and quickly.
2. Using Global Guidelines in a Regional Setting
Because we are situated in Bangalore, we are familiar with the business and regulatory climate there. Their commitment to international best practices guarantees your company’s continued competitiveness and compliance, and their near proximity enables timely assistance and individualized treatment.
3. A client-focused approach Our ability to provide solutions that not only guarantee compliance but also foster the expansion and effectiveness of your company depends on our ability to comprehend your particular business goals and issues.
By opting for Chhota CFO for your GST Registration and related services, you entrust your business to a dedicated partner committed to your financial well-being and success.
GST registration is the process of obtaining a Goods and Services Tax Identification Number (GSTIN) from the GST authorities to collect and remit GST on goods and services.
Businesses and individuals must register for GST if:
Their annual turnover exceeds ₹40 lakh (for goods) or ₹20 lakh (for services), They are involved in inter-state trade, they are involved in e-commerce or online business, they supply goods/services under reverse charge mechanism, they are involved in the import/export business
GST registration can be done online through the GST portal by submitting the required documents.
The following documents are typically required:
PAN Card of the business owner, Aadhaar Card of the proprietor/partners/directors, Proof of business registration (Partnership Deed, Company Incorporation Certificate, etc.), Address proof of the business premises (Electricity Bill, Rent Agreement, etc.), Bank account details (Cancelled cheque or bank statement), Digital Signature (for companies and LLPs), Passport-sized photographs of owners
Once the application is submitted along with valid documents, GST registration usually takes 3 to 7 working days.
Yes, GST registration is free on the government portal. However, professional service providers may charge a fee for assistance.
If a business is liable for GST registration but fails to register, a penalty of 10% of the tax amount due (minimum ₹10,000) is imposed.
You can check your GST registration status on the GST portal using the ARN (Application Reference Number).
Yes, businesses can opt for voluntary GST registration to avail of input tax credit and expand their market reach.
No, GST registration does not need renewal. However, if a business is no longer operational, it must apply for cancellation of GST registration.